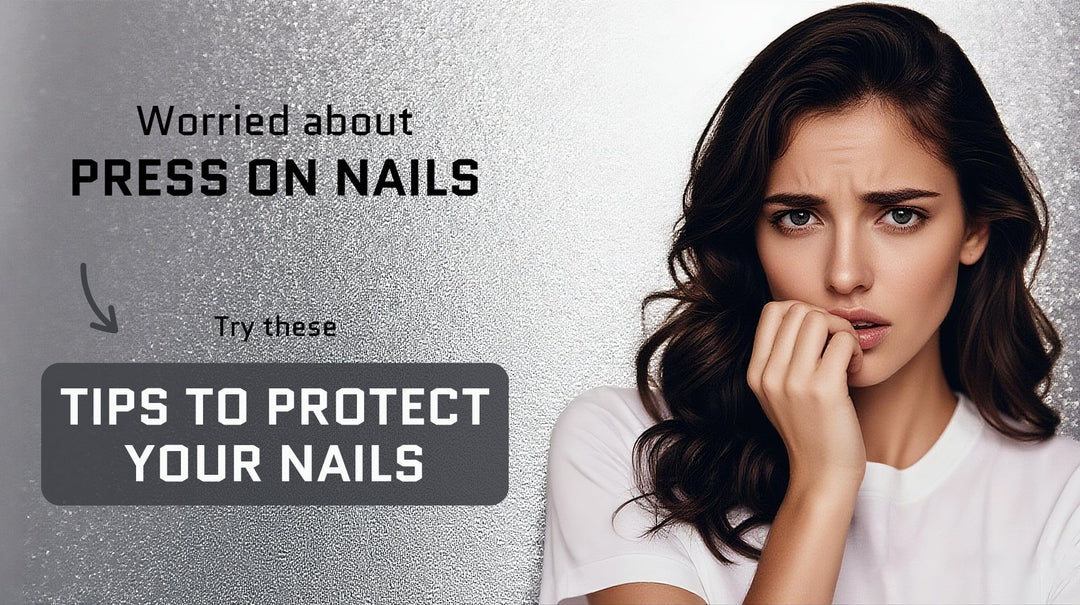

Beginner-Friendly Guide: How to Apply Press-On Nails That Look Totally Natural

Press-on nails have come a long way – no longer are they the obvious, pop-off-in-a-day fakes of the past. Today’s press-ons can look just as flawless as a salon manicure, if you apply them right. This beginner-friendly tutorial will walk you through how to apply press-on nails for a natural, salon-quality look you can do at home. We’ll cover everything from choosing the right set (shape, size, color, occasion) to prepping your nails and using the proper technique so your press-on nails look real and last. We’ve even included tips from experts, an easy video reference, and answers to common beginner FAQs. By the end, you’ll be ready to rock natural-looking press-on nails that no one will guess aren’t from a salon!
Choosing the Right Press-On Nails (Quality , Shape, Size, Color & Occasion)
The first step to achieving salon-look press-on nails is picking a set that suits you. Press-on nails come in a variety of shapes, sizes, and designs – and choosing correctly will make them blend seamlessly with your natural nails.

-
Quality : Pick premium press-on nails when choosing them; you'll notice the difference. Handmade nails typically have a more natural texture and finish, which makes them appear much more like a professional salon manicure than machine-made ones, which often seem a little fake.
The thickness of the nail's base, which adheres to your natural nail, should also be checked out. They are more comfortable to wear because a thinner base allows the nail to flex and better match the natural curve of your nail. To ensure that it blends seamlessly with your natural nail, much like a gel manicure, the area close to the cuticle should be exceptionally thin. However, the nail tip should be slightly more resilient to avoid bending or breaking, allowing you to wear them with assurance and without fear of harm.
-
Nail Shape: For the most natural look, go with shapes that complement your natural nail bed and finger shape. Common options include oval, almond, squoval (square-oval), square, coffin, and stiletto byrdie.com. If you’re new, short to medium lengths in oval or almond often appear more natural and comfortable for daily wear (they mimic the silhouette of real nails). Nail pros advise checking that the press-on’s curve matches your own nail curvature – a very flat press-on won’t sit well on a curved nail and vice versa byrdie.com. Also, beware overly extreme shapes: a super pointy stiletto might not scream “natural” (though it’s fun for a statement!). Tip from celebrity nail stylist Vicki Ornellas: if choosing almond or stiletto press-ons, look for those that don’t have a dramatic downward “hook” (sometimes called a bird beak shape) so they look more like a natural extension of your nail byrdie.com.
-
Size & Fit: Press-on nails usually come in kits with multiple sizes numbered to fit different fingers. The goal is to find the size that covers your nail sidewall-to-sidewall without overlapping onto your skin or cuticle reddit.com. Test a few sizes for each finger; if a press-on is slightly too wide, you can gently file the sides down for a perfect custom fit reddit.com. It’s better to resize a press-on than to wear one that’s too small (which can leave gaps or pop off). You shouldn’t feel the press-on pushing into your skin at the sides – if you do, it’s too big reddit.com. Many beginners wonder about brands that sell Small/Medium/Large press-on sets (like Naileph’s handmade sets). If you go that route, refer to the brand’s sizing chart – typically, Small fits narrower nail beds, Large fits wider, etc. (and Naileph even offers exchanges if you get the wrong size) naileph.com. When in doubt, choose the larger press-on and file it to fit your nail rather than a smaller one; a tight, small press-on may not adhere well or could feel uncomfortable reddit.comreddit.com.
-
Color & Design: To achieve press-on nails that look real, consider colors that mimic a natural or neutral nail. Sheer pinks, soft nudes, and classic French tips are beginner favorites because they resemble the tones of real nails or a simple manicure. For example, Naileph’s Classic French set features a soft pink base with a white tip – a clean, minimalist look that’s “sophisticated, perfect for any occasion” and has a natural shine naileph.com. If you prefer a solid color, try to match your skin’s undertone (just as you might with foundation): a nude that flatters your complexion will enhance the natural vibe. On the other hand, very bold or opaque colors can still look fabulous (and we love them!), but if realism is your goal, make sure the design could pass for an expensive salon paint job. One Reddit user noted that an extremely opaque color that didn’t complement her skin made her press-ons look less natural reddit.com – so sometimes it’s about finding your perfect nude or a design that suits your style. For special occasions, you can certainly go glam (glitter, chrome, 3D art, etc.), but beginners might start with simpler designs and shorter lengths to get the hang of it.
-
Occasion & Lifestyle: Think about when and where you’ll be wearing these nails. If you type or use your hands a lot at work, a shorter length or rounder shape will feel more natural for you (and be less prone to snagging). For everyday wear, many beginners love sets like Naileph’s Daily Wear collection, which offers trendy yet low-maintenance designs. If you have a special event (wedding, dance, holiday party), you might opt for a more dramatic set – just remember that long, elaborate nails draw more attention, so application needs to be extra flawless for them to look professional. Also, elaborate designs (like rhinestones or extreme lengths) might not feel as natural for first-timers. There’s no wrong choice, just balance beauty with comfort. The great thing is press-ons are affordable and temporary – you can always try a fun style for the weekend and go back to a simple look for the work week.
Bottom line: choosing the right press-on nails is half the battle in making them look natural. Pick a shape you can manage, sizes that fit well, and colors that complement you, and you’ll already be set up for a realistic result.
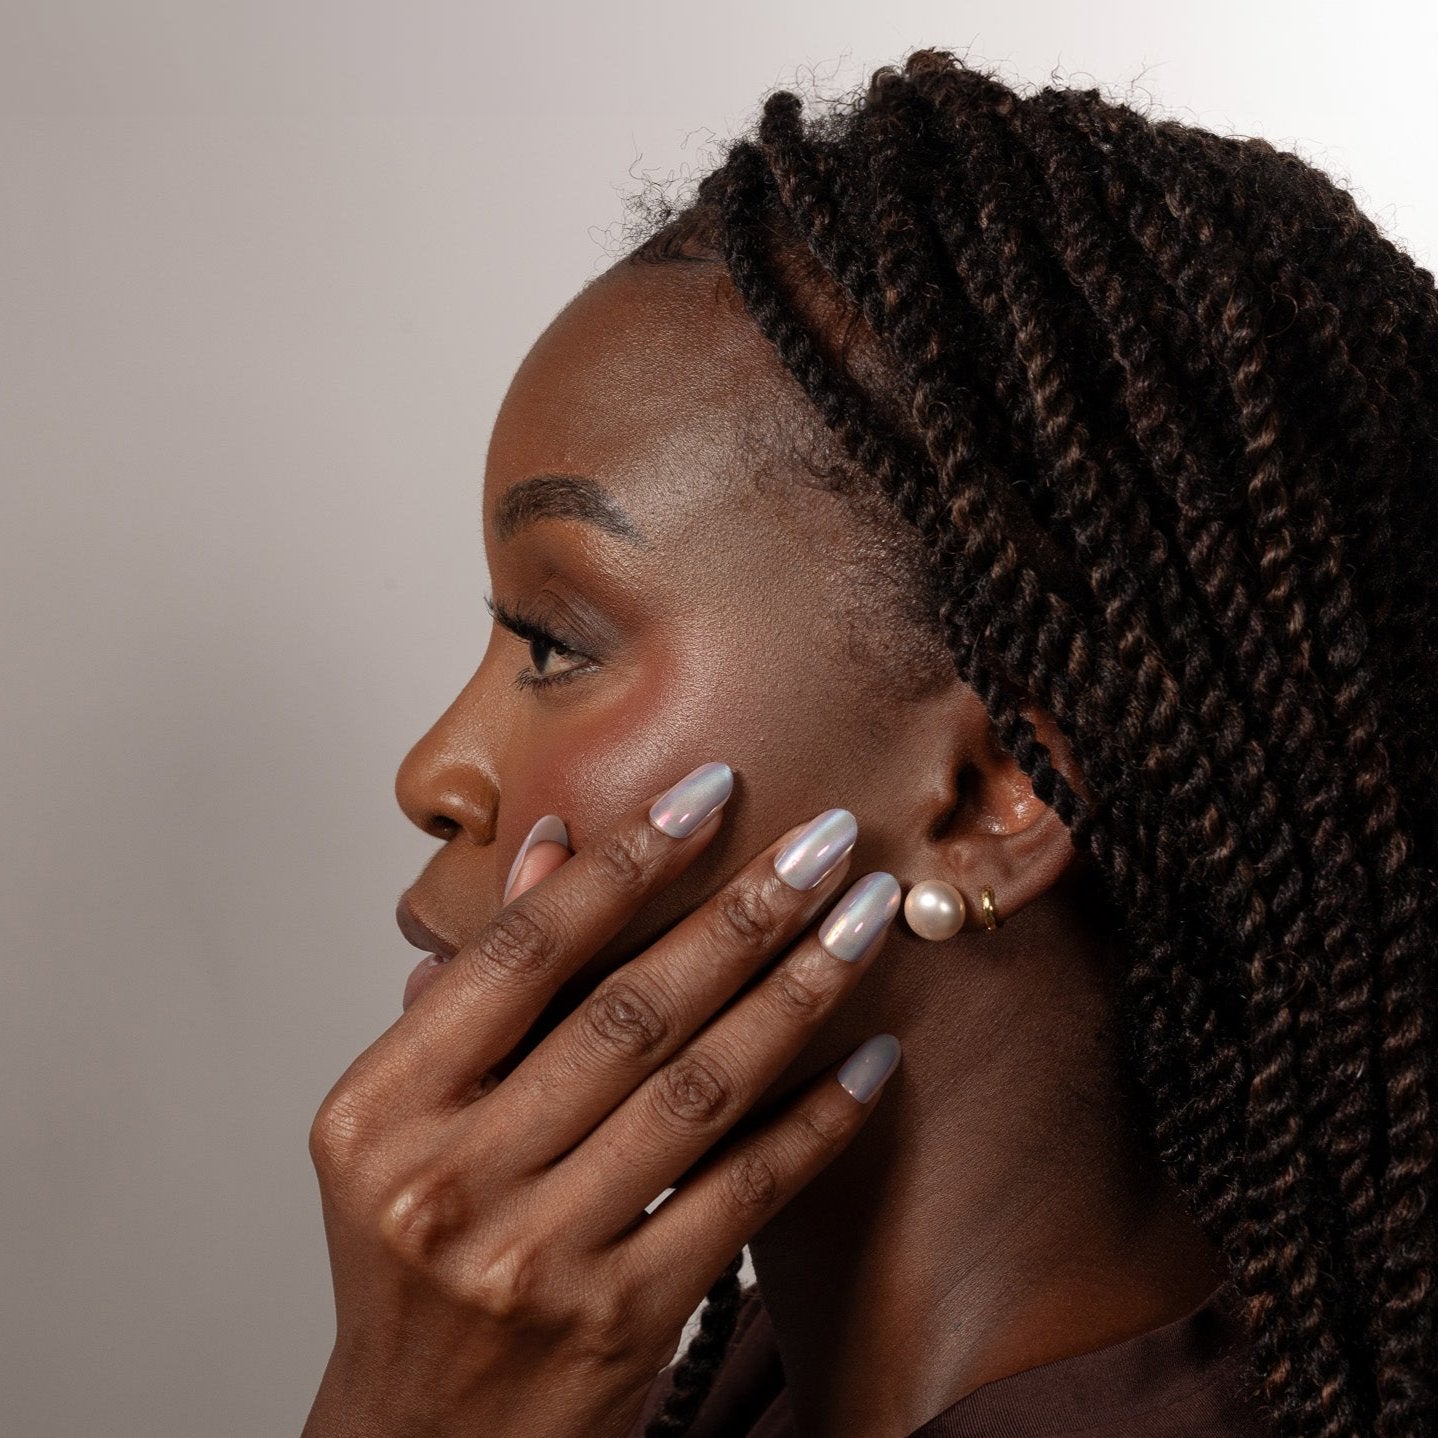
A close-up of well-applied press-on nails with a chic design. Notice how the press-ons fit the natural nail shape and sit flush at the cuticle – this kind of precise fit and proper sizing makes them look like a professional gel manicure.
Step-by-Step Tutorial: How to Apply Press-On Nails for a Natural Look
Now for the fun part – applying your press-on nails! 😊 Follow these step-by-step instructions to get a smooth, secure application. This process is beginner-friendly and will help your press-ons stay on longer and look like they were done at a salon. (We’ll also drop a link to a helpful video tutorial for visual learners.)
1. Prep Your Natural Nails – Proper prep is key to long-lasting, natural-looking press-on nails. Start with clean, dry hands. Remove any old polish or oils from your nails (use polish remover or an alcohol wipe). Gently push back your cuticles with a wooden cuticle stick naileph.com – don’t skip this, because press-ons should sit where your cuticle meets the nail; if the cuticle is covering part of your nail plate, the press-on might sit on top of it and stick up. You can also lightly buff the surface of your natural nails with a fine-grit nail file or buffer naileph.com. Buffing removes the shiny top layer of your nail. This isn’t to damage the nail – just a quick, gentle buff to add a bit of grit so the press-on adheres better (imagine sanding a surface before painting). Cleaning and buffing your nails removes natural oils that could prevent the glue from sticking makeup.com. After buffing, wipe nails with an alcohol pad to get rid of dust and oils naileph.com. Your nails should now be clean, slightly matte, and ready for glue.
2. Select and Prep Your Press-On Nails – Before gluing anything, take the time to size out which press-on will go on each finger. Most kits include numbers on the back of each nail – line them up from thumb to pinky for both hands. Ensure each one is a good fit (refer back to the sizing tips above). If a nail is a tad big, file the sides or base now for a custom fit reddit.com. Some press-ons (especially medium or long ones) have a little manufacturing tab at the tip – you can file that off now too so the tip edge is smooth. Pro tip: If you’re using a handmade or premium press-on set (like some of Naileph’s), they might already be pre-filed to specific sizes (S/M/L). In that case, just double-check the fit. You can also lay out your press-ons in order so the application will go faster and you won’t mix up sizes. At this stage, it’s also smart to prep your glue and other tools: have your nail glue open and ready (with pin or nozzle clear), and a paper towel handy.
3. Apply Nail Glue (Less is More!) – Quality nail glue is crucial for a secure, seamless application. We highly recommend using a brush-on nail glue (like Naileph’s pink-tinted brush-on glue) because it allows precise, thin layers of glue naileph.com naileph.com. A thin, even coat of glue helps the press-on adhere flush without bubbles or bulk. Brush a little glue onto your natural nail, covering it from the cuticle to tip. Also brush a bit of glue on the underside of the press-on nail itself naileph.com (coating the area that will sit on your nail). Applying glue to both surfaces ensures there are no gaps and can prevent air pockets, which not only helps nails stay on longer but also makes them look more natural makeup.com (air bubbles can be visible through clear press-ons). You don’t need a ton of glue – a thin, complete layer on each surface is enough. If using a squeeze tube glue: one small drop on your nail and one on the press-on, then spread it around with the nozzle tip.
Important: Avoid getting glue on your skin or cuticle; keep it on the nail area only. (If you do get some on your skin, quickly wipe it off with a little acetone on a Q-tip.)
4. Press On the Nail (Correctly) – Now it’s time to apply! Take the press-on nail and align it with your cuticle at a 45-degree angle makeup.com. This means you place the cuticle end of the press-on against your nail first, then slowly lower the rest of the nail down onto your natural nail. Doing it at an angle helps push out air and also lets you tuck the press-on just slightly under the cuticle for a seamless look quora.com (you don’t actually shove it far under your skin, just snug up to the cuticle line). Once the press-on is in position, press and hold it firmly for at least 10-15 seconds reddit.com. You can press straight down or slightly pinch the sides as well to ensure full contact. Hold that sucker down! This pressure is what bonds the glue. Some experts suggest pressing for up to 30 seconds per nail for maximum hold – you’ll see the glue spread under the nail (make sure it’s covering evenly). Wipe away any excess glue that squeezes out immediately (a little bit might seep out near the cuticle or sides; just use an orange stick or paper towel corner to remove it so it doesn’t dry cloudy on your skin). Tip: It’s often easiest to start with your smaller fingers (pinky) and do thumbs last makeup.com, since you use your thumbs for leverage while applying the others. After pressing, check that the nail is straight and adjust quickly in the first few seconds if needed (after ~5 seconds the glue grabs and you won’t be able to reposition).
5. Repeat for All Nails – Continue gluing and pressing on each nail one by one. Take your time with each to make sure it’s aligned and fully adhered. By the end, your hands will be looking fabulous! After all nails are on, give them a final firm press to make sure there are no lifted areas. Avoid submerging your hands in water for at least a couple of hours after application – the glue continues to cure and you don’t want to weaken it. (In fact, pro tip: do your press-on manicure at night before bed so they can set overnight without exposure to water.)
6. Finishing Touches – Once the glue is dry, you can gently file the tips of the press-ons if there’s any little tab or rough edge. Use a fine file and lightly shape for a smooth finish. If you want, you can apply a layer of clear top coat over the press-ons – high-quality press-ons usually come pre-finished and shiny, but a clear coat can seal any areas you filed and also make them look even more like a regular manicure. The last step is to hydrate your cuticles: brush on a bit of cuticle oil around the edges of the nails. This does two things: it nourishes your skin (because glue can be drying) and it adds a bit of sheen around the cuticle area, which actually makes the press-ons look more natural (a hydrated cuticle line blends in better, whereas dry skin can make the press-on edge more noticeable). Now your press-on nails at home are done, and they look amazing!
Optional – Watch a Video Tutorial: If you’d like to see the application in action, check out a beginner press-on nail tutorial on YouTube. One great example is “How to Apply Press-On (Glue-On) Nails That Last 3 Weeks – Complete Tutorial” by Abbyefied, a nail YouTuber. She demonstrates the prep, application, and removal in detail. Videos can be super helpful to visualize the 45-degree angle press and the amount of glue to use. (You’ll also pick up extra pointers, like slightly buffing the underside of press-ons for better grip – a trick some seasoned press-on lovers do reddit.com.) So grab your press-on kit, maybe put on the video, and follow along – you’ll get the hang of it in no time!
Pro Tips for a Flawless, Natural Finish
Before we move on to FAQs, here are a few extra tips & tricks to ensure your press-on manicure looks totally natural:
-
Make sure the press-on is flush with your cuticle: The fake nail should sit snugly where your cuticle begins, without a gap. If it’s overlapping onto your cuticle, it will lift at the base and look fake. If there’s a visible gap, it might catch dirt or show an obvious line. Filing the base of the press-on to match your cuticle shape can help it fit like a puzzle piece reddit.com. When applied, the bottom edge of the press-on should almost disappear into the cuticle area.
-
No air bubbles: Air pockets under the press-on can look like little cloudy spots and can also harbor moisture (bad for lasting power). Using the angle and press technique with glue on both surfaces (as described above) will eliminate most air bubbles makeup.com. Pressing from cuticle to tip pushes air out the free edge. If you do end up with a small air bubble you can see, sometimes applying a bit more glue at the edge and pressing can fill it – but if it’s large, you might need to reapply that nail.
-
Choose realistic lengths and designs: Especially for beginners aiming for a natural look, consider starting with short to medium length nails. They not only feel more natural but also are less likely to announce themselves as press-ons. A realistic fake nails look is easier to pull off when the length isn’t extreme (e.g., a short squoval nude set will fool people much more easily than ultra-long coffin neon nails – for hopefully obvious reasons!). You can always graduate to longer sets as you become confident with application.
-
Mind your daily activities: Treat your press-ons like you would natural long nails or fresh extensions. Don’t use your nails to pry things open (use the pads of your fingers instead). Wear gloves when doing housework or dishes. Avoid super hot water on them for long periods (like very long hot baths or washing hair vigorously on day 1). Little things like that help them stay secure longer, which in turn keeps them looking good and aligned. If one does loosen or pop off prematurely, don’t worry – you can clean off any glue and reapply it (always carry a little nail glue in your purse for emergencies!). But proper prep and application should minimize these issues.
By following the steps and tips above, you’ll have achieved a set of press-on nails that look totally natural. Friends will be asking, “OMG when did you find time to hit the nail salon?” – and you can wink because it only took you about 15 minutes at home! Now, let’s answer some of those burning beginner questions.
Beginner FAQ: Press-On Nails Basics
Q: What size press-on nails should I choose?
A: Sizing is crucial for a natural look. You want each press-on nail to cover your natural nail completely without overlapping onto your skin at the sides or cuticle reddit.com. Most press-on kits come with an assortment of sizes – try a few to find the best fit for each finger. The right size will feel “hugged” onto your nail – if it’s too big, you’ll see it touching your skin (and it may lift at the edges); if it’s too small, you’ll see part of your natural nail exposed on the sides. If you’re between sizes, it’s usually best to go slightly larger and file the edges down for a custom fit reddit.com. Using a nail file, you can trim the width or shape of a press-on for a perfect match to your nail beds. Wearing a press-on that’s too narrow can cause it to pop off or feel tight. Some brands (like Naileph’s premium sets) offer their press-ons in Small, Medium, Large set options – these refer to the general width range of the nails. For instance, a “Small” set might cater to petite nail beds, whereas a “Large” set has wider nails for larger nail beds. If unsure, check if the brand provides a sizing guide. Naileph, for example, allows exchanges on their handmade sets if the size isn’t correct naileph.com, so you’re not out of luck if you choose wrong. The bottom line: take a few extra minutes to size your nails properly (even make a note of your nail numbers for future sets). Proper sizing ensures the press-ons sit flush and look natural – it’s worth the effort!
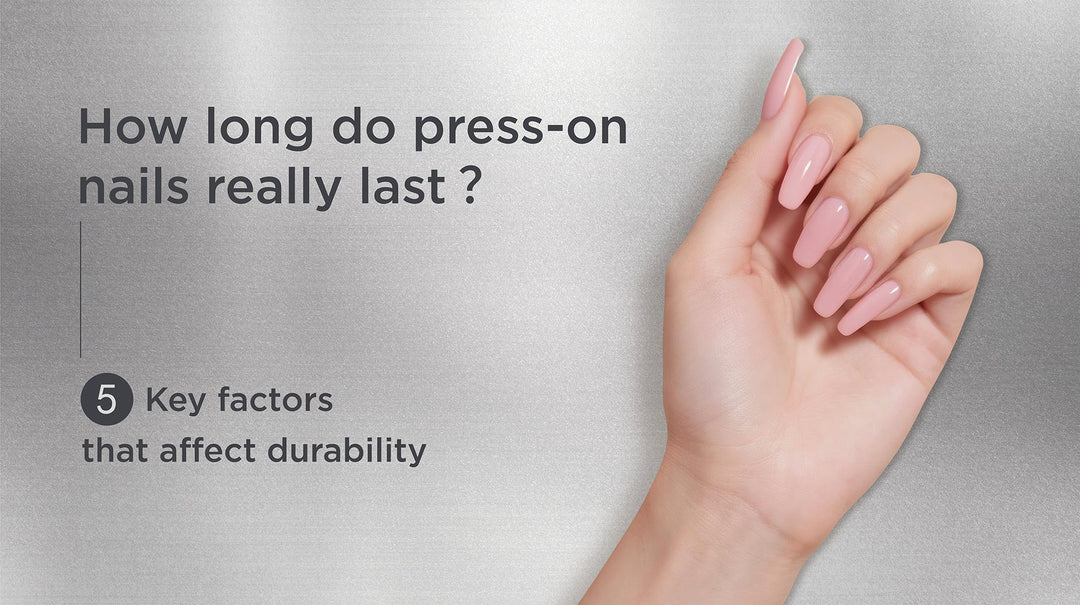
Q: How long do press-on nails last?
A: It depends on how well you prep and care for them, but a good application can easily last about 1 to 2 weeks. In fact, many people report press-on nails at home lasting 10 days or longer with quality glue – and some veteran press-on lovers even get 3 full weeks of wear before needing to swap sets! youtube.com Generally, using a strong glue-on method (not just adhesive tabs) will give the longest wear. Naileph’s own brush-on nail glue provides a secure bond for 5–10 days of normal wear naileph.com, and often press-ons stay firmly on until you decide to remove them. Their glue kit description notes a strong hold that “can last between 7–30 days or more” with proper application naileph.com – your mileage may vary, but it shows what’s possible when you really prep well and take care of your nails. In practice, most users get around 1-2 weeks per set of press-ons. Several factors affect durability (see the image below 👇):
How long your press-on nails last depends on a few key factors: 1) how well you prep & apply them, 2) the adhesive quality (glue vs. tabs), 3) the nail shape/fit, 4) your daily habits (how rough you are with your hands), and 5) the design/length of the nails.
If you prepare your nails properly (clean, buff, etc.), use a good glue, and avoid unnecessary stress on your nails, you should easily get a week or more of wear. For maximum longevity, try to avoid soaking your hands in water for very long (wear gloves for dish-washing) and avoid using your nails as tools to open or pick at things. Those little behaviors can add up to several extra days of flawless wear. Also, shorter and well-fitting nails tend to stay on longer (if a press-on is too large or catches on things, it’s more likely to lift). Ultimately, press-ons are meant to be a temporary manicure solution – but “temporary” can mean 2 or even 3 weeks if you treat them kindly! And if you ever notice one starting to loosen, you can always do a quick touch-up with a drop of glue to extend its life. In summary: 5-7 days of perfect wear is very common, 10-14 days is achievable with great application and care, and beyond that you’re basically an at-home nail tech superstar 😄.
Q: Can I reuse press-on nails?
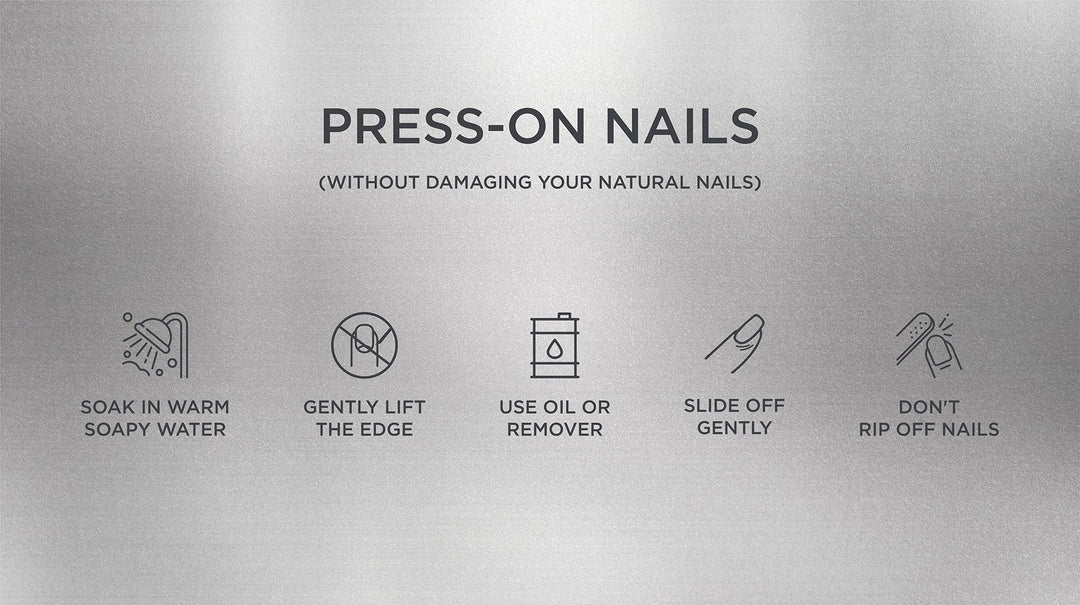
A: Yes – one of the great things about higher-quality press-on nails is that many of them are reusable! In fact, lots of people will wear a set for a week or two, carefully take them off, and later reapply them for another go. The key to reusing press-ons is to remove them gently so you don’t damage the nail. Avoid ripping them off or bending them, as that can crack the press-on or leave glue residue. Instead, use a proper removal method: soak your nails in warm soapy water or use a nail glue remover (like Naileph’s brush-on remover, which is designed to dissolve the glue) naileph.com. After removal, clean off any residual glue from the press-on nail. You can lightly buff the hardened glue off the back of the press-on or use an alcohol pad to rub it awaybtartboxnails.com btartboxnails.com. As long as the press-on nail remains intact and the finish isn’t ruined, you can definitely reuse it. Many premium press-on sets are made to be durable and can be worn multiple timesbtartboxnails.com btartboxnails.com. How many uses you get varies – but generally, a good set can be reused 3 to 5 times if you’re careful btartboxnails.com. A tip for easier reuse is to consider adhesive tabs for short-term wear: adhesive tabs don’t bond as strongly as glue, so the nails will come off with less effort and little to no residue, making reuse a breeze btartboxnails.com. (However, tabs usually only hold for a few days, so they’re best for weekend wear or an event.) If you use glue, removal is a bit more involved but still very doable. One removal hack: apply a few drops of cuticle oil around the press-on, then soak in warm water – this can seep under and help loosen the glue. Always be gentle when prying off press-ons; use a cuticle stick to lift the edges slowly after the glue has dissolved or softenedbtartboxnails.com btartboxnails.com. After removal, store your nails in the box or a clean container, and they’ll be ready to glam up your hands again! Just make sure to also take care of your natural nails in between (apply nail strengthener or oil) so they stay healthy. Reusable press-on nails are a great way to save money and get the most out of a cute set – just handle them with care, and you can pop them on and off for multiple manicures.
Q: What are the best tools or products for a beginner?
A: Aside from your press-on nail set itself, a few basic tools and products will make your life so much easier (and your results better). Here are our top recommendations for beginners:
-
Brush-On Nail Glue: Ditch the cheap tiny tube and get a quality brush-on glue. The brush applicator gives you control to paint a thin, even coat of glue – which helps nails stick better and avoid messy overflow. We love Naileph’s Brush-On Nail Glue, which is a light pink, semi-transparent glue that provides a strong yet natural-looking bondnaileph.com. It dries into a thin layer (so the nail doesn’t look chunky) and can hold nails for a week or even morenaileph.com. A good glue is absolutely worth it for long-lasting press-ons. (Bonus: Naileph sells a Press-On Nail Glue Kit that includes the brush-on glue and a matching remover in one packagenaileph.com – perfect combo for beginners to apply and remove like a pro.)
-
Wooden Cuticle Stick (Orange Stick): This little stick is your multi-tasking hero. Use it to push back cuticles during prepnaileph.com, clean up excess glue, and later help pry off nails during removal. It’s gentle on your nails and skin. Many press-on kits include one, but you can also buy a pack for cheap.
-
Nail File/Buffer: You’ll want a fine-grit nail file to lightly buff your natural nails (removing shine helps the glue adhere betterbyrdie.com) and to shape press-ons if needed. A buffer block is also handy for smoothing edges. Buffers with a 240-grit are safe for natural nail preppingyoutube.com. Keeping a file in your purse is also great for snag emergencies.
-
Alcohol Pads or Nail Cleanser: Any isopropyl alcohol wipe will do – use it to clean your nails right before application (after buffing) to ensure no oils or dust remainnaileph.com. This step can be the difference between a press-on that pops off in 2 days versus one that lasts 2 weeks, so don’t skip the cleanse! You can also use alcohol pads after removal to wipe residual glue off the press-ons or your natural nailsbtartboxnails.com.
-
Cuticle Oil: A nourishing cuticle oil (like jojoba or a vitamin E oil blend) will keep your natural nails and surrounding skin hydrated. This is especially important since you’ll be buffing and using alcohol (which can dry the skin). Applying cuticle oil daily will prevent your nails from drying out or becoming brittle under the press-ons. It also makes the press-ons look better because healthy, moisturized cuticles = a more realistic finish.
-
Press-On Nail Stand (optional): If you really want to be extra, some people use a little nail stand or holder to set out their press-ons and even pre-paint or design them. As a beginner, you likely won’t need this unless you plan to paint your own press-ons. But organizing your nails on a towel or tray in order of application can be helpful.
To sum up, investing in a good glue and having a few basic manicure tools on hand will set you up for press-on success. The good news is that many press-on kits come with most of these (like a mini file, stick, and sometimes an alcohol pad), and a bottle of brush-on glue is just a few dollars and will last through many manicures. Gather your toolkit, and you’ll be ready to slay your realistic fake nails look!
Recommended Starter Sets & Products
Not sure which press-ons to try first? Here are some beginner-friendly press-on nail kits and tools we highly recommend:
-
Naileph “Classic French” Press-On Nail Set – You truly can’t go wrong with a classic French manicure, and Naileph’s set is perfect for beginners. These nails are a medium, chic square shape with a soft pink base and white tipsnaileph.com. They strike a balance between natural and polished, making your hands look clean and elegant. Each kit includes 24-30 nails (so plenty of sizes to find your fit) and a mini file and stick. The French tip design is timeless and versatile – great for work, weddings, or anytime you want that “fresh from the salon” vibe. Plus, the subtle nude-pink tone is very forgiving and realistic on most skin tones. If you’re nervous about bold colors but want something prettier than plain clear, this is your go-to. As the description says, it’s a “sophisticated, minimalist look, perfect for any occasion” naileph.com. (Bonus: It’s part of Naileph’s Daily Wear collection and is very affordable, so a great starter set.)
-
Naileph Press-On Nail Glue Kit (Brush-On Glue + Remover) – This little $8 kit will be your BFF. It comes with Naileph’s brush-on nail glue and the brush-on removal solution naileph.com. The glue is top-notch for creating a thin, invisible bond that lasts (no gloopy mess, and it dries with a **“real manicure” thin feel naileph.com). This set comes with the Naileph Glue-Off Dropper, a non-toxic, odorless remover that gently dissolves nail glue, sticky tabs, and even glitter polish—without damaging your natural nails or cuticles. No harsh chemicals, no strong smells—just an easy, cuticle-safe removal every time.
-
Neutral or “Nude” Press-On Sets (Various Brands): If French tips aren’t your thing, look for monochromatic nude sets. A couple of ideas: “Blossom Pink” or “Nude Jelly” from Naileph’s Mono Color collection are gorgeous semi-translucent nudes that mimic a natural nail bed. Nude press-on nails with a short oval shape can be practically undetectable as fake – they just look like you have naturally perfect nails with maybe a clear gel on top. These are great for everyday wear and especially office environments or conservative settings where you want your nails to look well-groomed but not flashy. Another bonus: solid colors are easy to paint over or add nail art to, if you ever want to experiment.
-
Accent Nail Packs / Mix-and-Match Sets: Some brands offer mix packs where you get a few accent designs along with solids. For example, a set might include 20 solid color nails and 4 accent nails with a design (like glitter or marble). These are fun for beginners because you can decide to use one or two accent nails per hand for a pop (very much like salon trends), but keep the rest simple. It’s an easy way to dip your toes into nail art without having to do any yourself. If you find a press-on kit like this in a style you love, it can give a professional, curated look effortlessly.
-
Press-On Nail Tool Kit: If your press-on set doesn’t include them, consider getting a small nail tool kit. Naileph has a Care section where they offer things like a Press-On Application Kit or individual tools. At minimum, snag a cuticle pusher, a nail buffer, and a good file. These will be useful not just for press-ons but for general nail maintenance.
Remember, part of the fun is trying different styles to see what you like and what suits your hands. Brands like Naileph offer a range from subtle to bold. As a beginner, you might start with something like the Classic French or a nude set for your first attempt, since these styles are almost foolproof in looking natural. Once you’re comfortable, you can venture into more adventurous designs (holographic chrome, anyone? 😍). The salon-look press-on nails world is your oyster!
Conclusion
You now know everything you need to know to do a beautiful press-on manicure that looks as natural as possible. People will inquire, "Which salon do you go to?" when they see your press-ons if you use the right materials, prepare them well, and apply them correctly. (You may brag that you did it yourself!) This guide for beginners contains everything you need to know, from how to choose the right set to how to press them on for a beautiful finish. The best part is that press-ons let anyone do nail art and salon designs at home. So go ahead and give it a shot! Please show us your results! Whether you choose a classic French tip or a modern style, show off those beautiful new nails. If you have Instagram, please tag us in your manicure pictures using the handle @Naileph. Seeing our Naileph nails out in the wild and looking great on you makes us very happy. 💕 You can change up your style whenever you want with a little practice. Keep in mind that it's all about having fun and expressing yourself. Put on those press-ons that appear like they belong on your nails and show off your manicure. You've got this!
Happy pressing on, and welcome to your new life with salon-quality nails at home! 🥰💅 Get ready, set, press on!